Friday, April 24, 2015

Welcome Back To Blogging With Chocolate Chip Cookies

          Now that the spring semester is almost over and I have taken my anatomy lab life can get back to my favorite hobbies. Some of my favorite hobbies are knitting, cooking, gardening, and baking. Let me tell you this, anatomy is a class that was sucking all the life out of me and was a super hard to remember all of the bones, muscles, and nerves. Sometimes to get through the memorization of them items, I needed to come up with some R-rated mnemonic to remember things.

         Last night while the husband was on an overnight snow machining trip far up North in the Paxson and Valdez area for one last trip of the season. The 2014-2015 season is  the first year that we have had to travel 3 to 4 hours one direction to find some snow to ride on. The Anchorage area has only had 20 inches of snow.  But, back to the original story, while he went snow machining I decided to try a new recipe that I had thought up.
Sorry about the picture, it is from my iPhone. 

Dark Chocolate Coconut Chip Cookies
1 stick of butter (softened)
1 8oz. package of cream cheese (room temperature)
2 eggs
1 cup sugar
3/4 cup brown sugar
2 tsp vanilla
2 1/4 cup flour
1 bag of dark chocolate chips (can use any chip or chunk)
1/2 cup coconut (I didn't measure, just dumped until I liked the look)
2 tsp cornstarch
1 tsp baking soda
1 tsp salt

         Cream together the butter, cream cheese, sugar, and brown sugar in a bowl. Once combined, put the eggs and vanilla in the bowl next, mixing them with the butter mixture.  Add the flour, baking soda, cornstarch, and salt in the mixture and combine until well mixed. Finally add the coconut and chocolate stirring them until mixed in the dough.  Bake at 350 for 12 - 15 minutes until light golden brown.  I used a cookie scoop and flattened them down because they do not spread like regular cookies.  Makes about 30 cookings using a cookie scoop. They turned out moist and tender cookies that go great with a big glass of milk.

Monday, March 2, 2015

Wonderful Beans and Big Plans


Big news!! I haven't been promoting this blog due to feeling a little self-conscious about my writing. A couple nights ago I shared the link to the pot roast blog on a Facebook group asking for honest opinions. The feedback was good, and I got some great suggestions. I am going to start working on a Facebook page Peggy's Adventures in Cooking to promote things and sending it out to close personal friends.

This recipe comes from a wonderful friend of mine, Melissa. I had these beans over at her house on a night of a get-together of a group of her friends. I came home and immediately text her for the recipe because they were some of the best beans that I had ever had. These do not compare to the ones in the can. Frankly, these beans are super low maintenance, inexpensive, and can be used in a bunch of dishes. They would also freeze well.  Looking back on the week, I realized that I hadn't cooked anything worthwhile all week. Between school and homework, quick and easy was the best option, is always scrambled eggs.

These beans will be used in a lot of different ways. I plan on adding them to eggs for more protein and fiber, making burritos, and eating them with salads.  I also did a little evaluation of the budget, realizing that I have been eating out a lot, which is costing more money than I would like. One way to curb this is by making a bunch of things that can be eaten on the go or quickly. This recipe is very straightforward and very easy.

You will need a heavy duty Dutch oven pan. My favorite one is a Red Lodge cast iron pan, that I purchased at the local superstore.  The beans will cook about two hours at 400 degrees until done. This recipe could be easily adapted to a crock pot allowing you to leave the house and go about your errands. But, because it is a lazy day  that I do not plan on leaving until later on in the day to go to a movie.


1 bag of beans (White, navy, pinto, or black) about 2 cups
Enough water to fill above beans (About 1 inch)
3 bay leaves
3 cloves of garlic
2 Tbsp of chicken broth concentrate (I bought my at Costco)

1) Pour your beans in the pot
2)Add your bay leaves and garlic
3) Add water to about 1 inch above the beans
4) Add the chicken broth concentrate, stir
5)Place in oven on 400 for about two hours checking halfway to make sure there is enough liquid.


Sunday, February 15, 2015

Caramel Rolls

Caramel roll on my Grandma's china dish

A lot my recipes are designed out of cravings for things that I can not find anywhere, or they are not as good as the original. Been craving my grandma's caramel rolls. Now, these are huge in North Dakota and haven't seen them anywhere but the midwest. Can venture to say that any family run cafe, truck stop, or diner you walk into there will be a gooey selection of perfectly baked caramel rolls sitting there just calling your name.

The other day after looking through the cookbook, my mom created after I got my very first place when I was 18 and not finding the recipe I wanted for the rolls. Mom to the rescue, she was able to give me the recipe for the caramel. When I was a kid, it always seemed much more complicated when I helped Grandma. Now, I was told that my grandma always used frozen bread dough. But, because I forgot it at the store last night, homemade white bread dough was substituted.

Gooey caramel sauce

Caramel Sauce
3 cups of brown sugar
1 stick butter
1 cup heavy whipping cream

Put all the ingredients for the caramel sauce in a sauce pot. Turn your burner on to medium heat, cooking until it is combined. Place the sauce into two cake pans, diving evenly.

Before (l) After (r) rise

White Bread Dough
6 cups unbleached white flour
4 1/2 tsp Yeast
4 Tbsp sugar
2 cups water (around 110 degrees Fahrenheit)
2 tsp salt
1/2 cup vegetable oil

1/2 stick of melted butter


Place the water, yeast, and sugar in a dish allowing the yeast and sugar to dissolve. Allow it to foam and sit on the counter for about 10 minutes.  In the mixer with your dough hook, place the flour, salt, and vegetable oil. Once your yeast mixture has sat for the specified time, add that to your mixer. Once the dough is combined into a ball, place in a greased bowl covered with a towel until it has doubled in size. Punch the dough down and pull out of the bowl onto a floured counter top.


Once the dough is on the counter, drag out the rolling pin. Roll it out until it is one large sheet of dough. Spread on the melted butter evenly on the dough. Then cover the sheet of dough with brown sugar and cinnamon to you liking.  Once, all of the dough is coated, roll into a log. Divide the roll into 16 evenly cut pieces.  Place the rolls into the two cake pans evenly space. Cover the rolls with a towel allowing them to rise and double in size. Stick in the oven at 350 until golden brown and not doughy anymore.

Before the rise, after the rise, after the oven

After the oven take a cookie sheet larger than the pan, you baked your caramel rolls in. Place the cookie sheet on top of the pan and carefully flip it over. I do mean carefully because there is a chance you could get scalding caramel onto the skin causing a painful burn. After they release, scrape the pan to get out all the sauce.  Enjoy them with butter and a big glass of milk.

Saturday, February 7, 2015

A New Pot, New Camera, and Pot Roast For Supper

After taking a hiatus from blogging, I am back! Life has been extremely busy lately. School started again; I am up to my eyeballs in anatomy to study and papers to write. Some days I question why did I go back?! In the end, it will all be worth it for a career that I am excited to do.   Today was the day that was my day to cook.

The husband told me the other night that he wanted pot roast; it is rare that I get a specific request from him for food. Told him that this weekend would be the time for it, well we are having date night Saturday and going to Alaska Aces hockey game on Sunday. Tonight was the night, and we are having the perfect weather for pot roast. It has been extremely windy and cold here today, time for comfort food. My lack of planning in, not bringing my crock pot home from work is the reason for a new Dutch oven pan. I didn't have one that was meant specifically for the stove and long cooking times.

I also got a new camera. Graduated from the iPhone or point and shoot with a Nikon D3200 DSLR camera. Safe to say that it has more gadgets, buttons, and options that I am excited to play with.   First project to try was a new blog post.   This is a long-winded way to say that I am going to give the recipe for my pot roast.

Pot Roast
3 to 4 lb Chuck Roast
5 carrots
2 onions
Two cloves garlic
Olive oil
Salt and pepper
Rosemary
Basil
3 cups beef stock

1) Pull your roast out of the fridge 30 min before planning on cooking. Turn your oven on to 300 degrees Fahrenheit.
2) Peel and chop your carrots, setting aside.
3) Salt and pepper your roast on both sides liberally with salt and pepper.

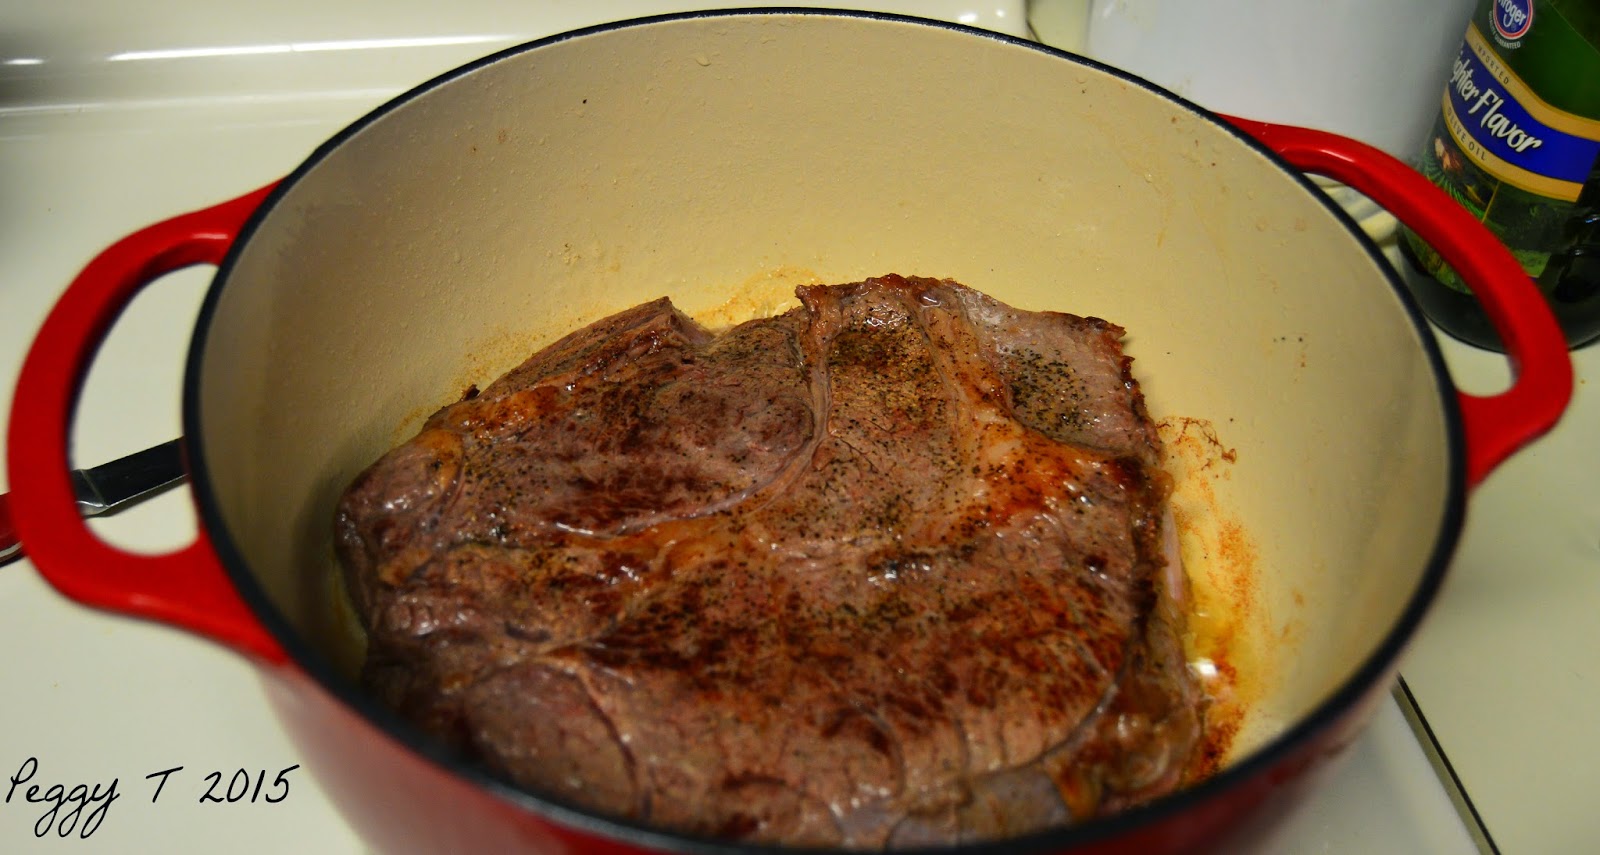
4)Pour some olive oil into the pan, turning it on high. Once the oil is heated put the chuck into the pot. Searing it on all sides.
5) Once it is browned on all sides, pull it out letting it rest on a plate.
6) Place the onions, carrots, and garlic in the pot allowing the veggies to get a little brown color on it.
7) Setting the veggies in a bowl, pour your beef stock into the pan getting all the brown bits up off the bottom of the pan.
8) Place the roast and veggies into the liquid with some rosemary and basil.

9) Put the lid on, sticking it in the oven, and let it cook on the temp for 2 1/2 to 3 hours.

This was the best pot roast that we have had. We devoured it, and I forgot to take a picture of the final product.

<a href="http://www.bloglovin.com/blog/13651897/?claim=nejxdxbxupy">Follow my blog with Bloglovin</a>

Wednesday, December 17, 2014

Turkey Shepherd Pie

This recipe comes out of a random food craving for comfort food. Comfort food to me is anything that has potatoes and gravy. But, my waistline would not appreciate the fact that potatoes and gravy would cause me to buy new pants and hit the gym more than normal. I took the original recipe for shepherd's pie and modified it to fit a healthier version of the original. Here goes nothing

#Turkey #Shepherd #Pie


Turkey Shepherds Pie.
1lbs
Ground Turkey
3 cloves
Garlic
1 pkg
White mushrooms (Caps chopped)
2
Carrots (shredded)
1 c
Frozen corn
1c
Frozen peas
1 whole
Onion (chopped)
3 tbsp
Flour
2 cups
Chicken stock
1/2 tsp
Salt
1/4 tsp
Pepper
1 tsp
Dried thyme
1 tsp
Dried rosemary
4 tbsp
Vegetable oil


Sweet Potato Mixture
1 1/2 lbs
Sweet Potatoes
1/2 c
Chicken stock
3 tbsp
Sour cream

Salt and pepper to taste

Peel and dice the sweet potatoes and place in a pot of salted water
Bring the pot to a boil and cook until fork tender.
Once tender, with a handheld mixture beat the sweet potatoes, chicken stock, and sour cream until combined and fluffy.


#turkey #shepherd #pie

Brown the ground turkey with salt and pepper until cooked thoroughly
Place in a bowl the turkey and cook the onions, mushrooms, and garlic until the onions are translucent, and mushrooms are not producing liquid
Add the ground turkey back in, and then add the olive oil and flour. Cooking that for a little bit to make the flour taste out.
Place in the chicken stock and stir until no lumps.
Add the carrots, peas, and corn
Add the seasonings to your liking.
Place mixture into an oven safe dish and then top with the sweet potato mix.

Bake until everything is warm and bubbly. 

Tuesday, December 16, 2014

Orange Pistachio Ice box Cookies

          Today has been a huge baking day in my house. When I say big, I am talking about 3 batches of my grandma's sugar cookies, 2 batches of chocolate chip cookies, and 1 batch of the orange pistachio ice box cookies.

          The inspiration for the orange pistachio cookies came from a 6 hour flight to Minneapolis from Alaska and watching the first episode of  Holiday Baking Championship on the Food Network. The original recipe for this cookie was just a regular ice box cookie that has been in my family and passed down for years.
#Orange #Pistachio #vintage #china
Orange Pistachio Ice Box Cookies on vintage china


Orange Pistachio Ice Box Cookies
Zest of two oranges
1 1/2 tsp of orange extract
2 C Shortening (butter or Crisco)
1 C Brown Sugar (Packed)
1 C Sugar
2 Eggs
5 C Flour
1tsp baking powder
1/2 tsp salt
1 C chopped pistachios

1.     Zest the oranges and set aside
2.     Cream the shortening, sugars, and eggs until pale yellow color
3.     Add in orange zest and extract
4.     In separate bowl place the flour, salt, baking powder and mix lightly
5.     Spoon the flour mixture and nuts into the wet ingredients.
6.     Mix until they are combined.
7.     Place on a sheet of aluminum foil forming a large roll.
8.     Stick in the freezer for about 12 hours.


Before baking pull out of the freezer. Slice them to the thickness you like and bake at 350 until edges are golden brown. 


Friday, December 12, 2014

Lazy Sunday Of Football and Trying A New Recipe

Today has been a balmy 32  degrees Fahrenheit in Alaska and where I grew up in North Dakota it was -22 Fahrenheit with the wind chill of -57 below., BURR!! I spent today going to the gym and trying out a new recipe.  The original recipe was found on Pinterest.  Here is the link to the original Jambalaya. I have modified it for healthy substitutions.

Peggy's Healthy Jambalaya
1 green pepper chopped
1/2 large sweet onion, chopped
1 red pepper cut
1/2 jalapeno
4 Turkey kielbasa, sliced
1 28oz can of Crushed tomatoes in the heavy sauce
2 chicken breast
2 cups of brown rice
4 cups of Chicken broth (I like mine a little soupier than normal, and you can use less)
3 teaspoons of Cajun Seasoning
Frozen Okra

Chunk the chicken, brown it, and remove and set aside

Put the Peppers, onion,  and kielbasa in the pot with a tbsp of canola oil. Cook until they are tender.

Put the chicken back in the pot and add the rice. Stirring it around so that the rice gets coated.
Then you put in the chicken stock and Cajun seasoning in and let it simmer for 45 min.

Once it has simmered for the time allotted, add the tomatoes and okra, stir together. Let it simmer


It turned out AMAZING, and it froze well for a leftovers.   

Tuesday, September 9, 2014

Butternut Squash Risotto and Pesto Salmon

        Sorry guys, I realized today that it has been almost six weeks since the last blog was put up. What better way to avoid doing homework, than finding and creating new recipes. Maybe I was a little overzealous this semester to take nine credit hours. The end is in sight, will be finishing my certificate in Pharmacy Technician and applying for nursing school in February.

       With the leaves changing, temperature getting cooler, and everything is coming up pumpkin.  Mentioning homework, II did a twist on a pumpkin sage risotto. I made mine with butternut squash and dried sage.  The risotto paired well with my silver salmon that I caught two weekends ago. Going to get a little off topic for a minute, but I am very proud of the salmon. It was caught out in the ocean when my husband and I went out for our halibut charter with Saltwater Safari in Seward, Alaska.  The pesto for the salmon is made in my food processor.

        The risotto would be great paired with chicken, fish or pork as a side dish. I made the serving size about 2/3cup, yielding about 6 servings.  In the recipe, you will need 1 cup of butternut squash puree. There are two ways that you could cook you squash for the risotto. A person can boil the chunks of cut up squash in water until tender or toss the pieces with a little olive oil, salt, pepper, and sage (baking at 450 for 20 minutes).  Once the squash is done put a little more that a cup of cooked squash in blender or food processor with a little bit of chicken stock until a thick puree.


yummo


Butternut Squash Risotto
4 cups Chicken stock
1 cup butternut squash puree
2 tsp olive oil
3 cloves of garlic (I run the cloves over a micro plane or chopped
1/2 sweet onion
1 cup arborio rice
1 tbsp of dried sage (more or less depending on taste)
onions and garlic saute in pan 
Salt and Pepper to taste
1/4 cup parmesan  cheese (use the real stuff, not the stuff you put on pizza)

In a large saucepan heat the broth and squash until hot.

In another large pan over medium heat, heat the oil. Add onions, garlic, and rice until the rice is coated with the oil. Takes about 3 to 5 minute. Place a ladle of stock in the pan, constantly stirring until all the liquid is absorbed.  Add the sage to the mixture. Then continue adding ladles of stock and stirring the risotto until the stock is absorbed. Do this until all the stock is gone, and the rice is tender to the tooth. The process will take about 30 minutes from start to finish.  At the end just before service, stir in the parm cheese.

On to the salmon
Pesto Baked Salmon
1/4 cup of pesto (I used my recipe)
2 salmon filets
2 tbsp olive oil
Tin Foil

Preheat the oven to 425. On the tinfoil put the olive oil and salmon down, then cover it with the pesto mix. Seal the foil, place in the oven and bake for 15 minutes.

Pour yourself a glass of wine and enjoy


Monday, September 8, 2014

3 Bean Hotdish and Golfing


On this Sunday, we had a little bit of an adventure. It started out with me prepping my favorite bean dish and taking it over to his mom to warm it up for supper while we are out on our adventure.  I got my recipe from my dad's sister and have tweaked it to my favorite beans!


3 Bean Hotdish
1/2 lb bacon
1/2 lb ground beef
3/4 c brown sugar
1 can Bush's baked beans (any flavor)
1 can chili beans
1 can butter beans 
Chopped onion
1/2 c ketchup
1 tsp mustard


Brown the bacon 
Pull off and drain on paper towel

Brown burger and drain. In a bowl combine all the beans, ketchup, mustard, brown sugar, bacon, hamburger, salt, and pepper. Mix well
Put in oven safe dish and bake at 350 for an hour. 

Before supper, we were enjoying a nice sunny day after 3 inches of snow.  We decided to hit the driving range for a couple of buckets of balls. I have to say that I am completely out of shape for a golf swing.   But here are some fantastic pictures.  


Sunday, September 7, 2014

Walnut Pesto


Final product

I LOVE pesto!! But, cannot stand the stuff that is in the jars at the grocery story. I have a ton of basil growing in a pot in my kitchen right now and put it to good use.  With this recipe, you will need a blender or food processor with a powerful motor. Interesting fact, you do not need to have basil for pesto. A person can use spinach or arugula.

Homemade pesto
1 1/2 cup packed basil leaves
1/2 cup packed spinach
1/3 cup walnuts
2 cloves garlic
1/3 cup parmesan cheese
1/3 cup light olive oil
1/4 tsp salt
lots of pepper

Yumminess, in progress 
Put the basil, spinach, walnuts, garlic, salt, pepper, and parmesan cheese in your food processor pulsing until coarsely chopped. While the processor is going, slowly add the olive oil from the top until it is the consistency you want. I leave me a course chop, but you could make it as smooth as you like.  Pour into jar, covering with a thin layer of olive oil. This will last in the fridge for about a week.

Smoother it on everything and enjoy!

Tuesday, July 29, 2014

Jalapeno Stuffed Chicken Breast Wrapped In Bacon

What can be better than a dish with bacon in it?? A dish that has bacon and cream cheese in it!! This recipe was inspired by another one that I had seen last week reading a magazine while waiting for an appointment.  Tonight's supper plans changed drastically when I came out of the post office after mailing some packages, and it was downpouring. Originally it was going to be grilled pesto chicken and potatoes. But, either way I needed to go to the grocery store to get chicken. I came up with this while wandering around aimlessly at the store trying to find what I needed.  The result was an amazingly moist chicken breast.


Things you need 
2 boneless skinless chicken breast
4oz cream cheese (room temp)
1/2 c shredded cheddar cheese
2 jalapenos diced (I used my sweet pickled jalapenos)
4-6 slices of bacon 

1)Preheat the oven to 400 degrees
2) Combine cream cheese, cheese, and jalapenos in a bowl
3)Place the chicken on the cutting board and create a pocket where you can put the cheese mixture in it
4) Split the cheese mixture in half and squish into the chicken making sure none of it is exposed
5) Lay out the bacon, wrap the chicken breast, and place in oven safe pan
6) Put the pan in the oven for 30 minutes*.


*Side note: I ended up covering mine because my no matter what I do when I cook bacon in the oven my smoke detector goes off even if the bacon isn't burnt. With my bacon issue, I then transferred it to a frying pan and browned off the bacon.  

The next time making this I will be adding more spice. This is a very quick, simple meal for a weeknight. 

Monday, July 14, 2014

Breakfast Sandwiches

In the last couple weeks, I have done some serious money watching and realized that I spend too much on McDonalds breakfast because of not enough time to make something in the morning. Lightbulb moment, I decided to try and make a healthier version of the egg sandwich that can be frozen and reheated to eat in the morning.

Supplies
6 eggs
6 whole wheat English muffins
6 slices of American cheese
6 slices of bacon or sausage

#breakfast #Sandwich
Eggs pre-oven 
1) Preheat oven to 350
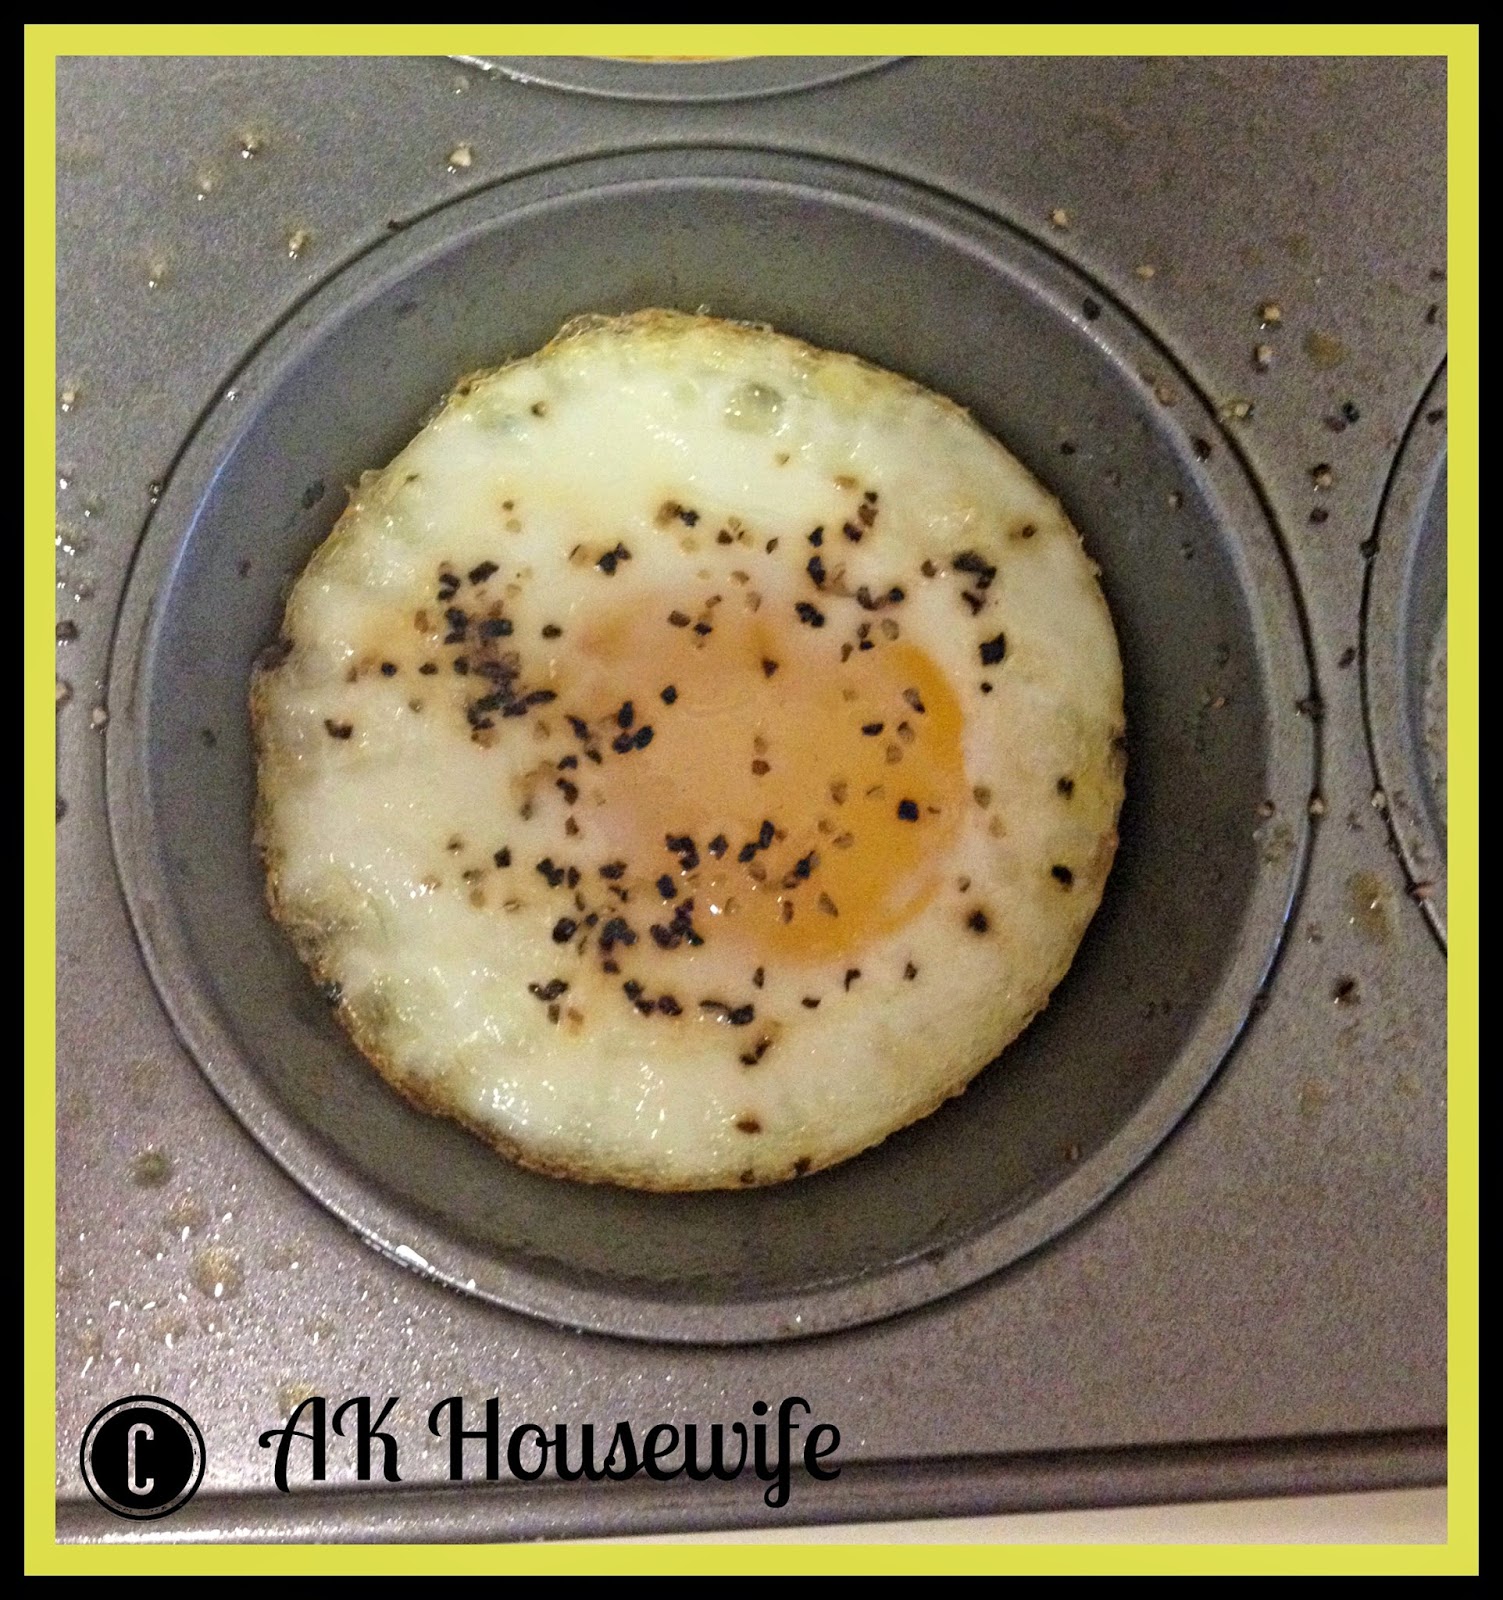
2) Spray muffin tin for the eggs. Crack the eggs into the muffin tin, add salt/pepper or other seasonings

3) Stick that tin in the oven, set the timer for 13 minutes.
4) While the eggs are cooking, cook the bacon and drain it.
#breakfast #sandwich
Eggs out of an oven 
5) When the eggs are done, pull them out of the oven and set aside. 


6) Line up the English muffins on the counter, unwrap and place the slices of cheese on the muffin. Put the egg on top of that  and finish it with bacon on top.
7) Place the tops on the sandwiches
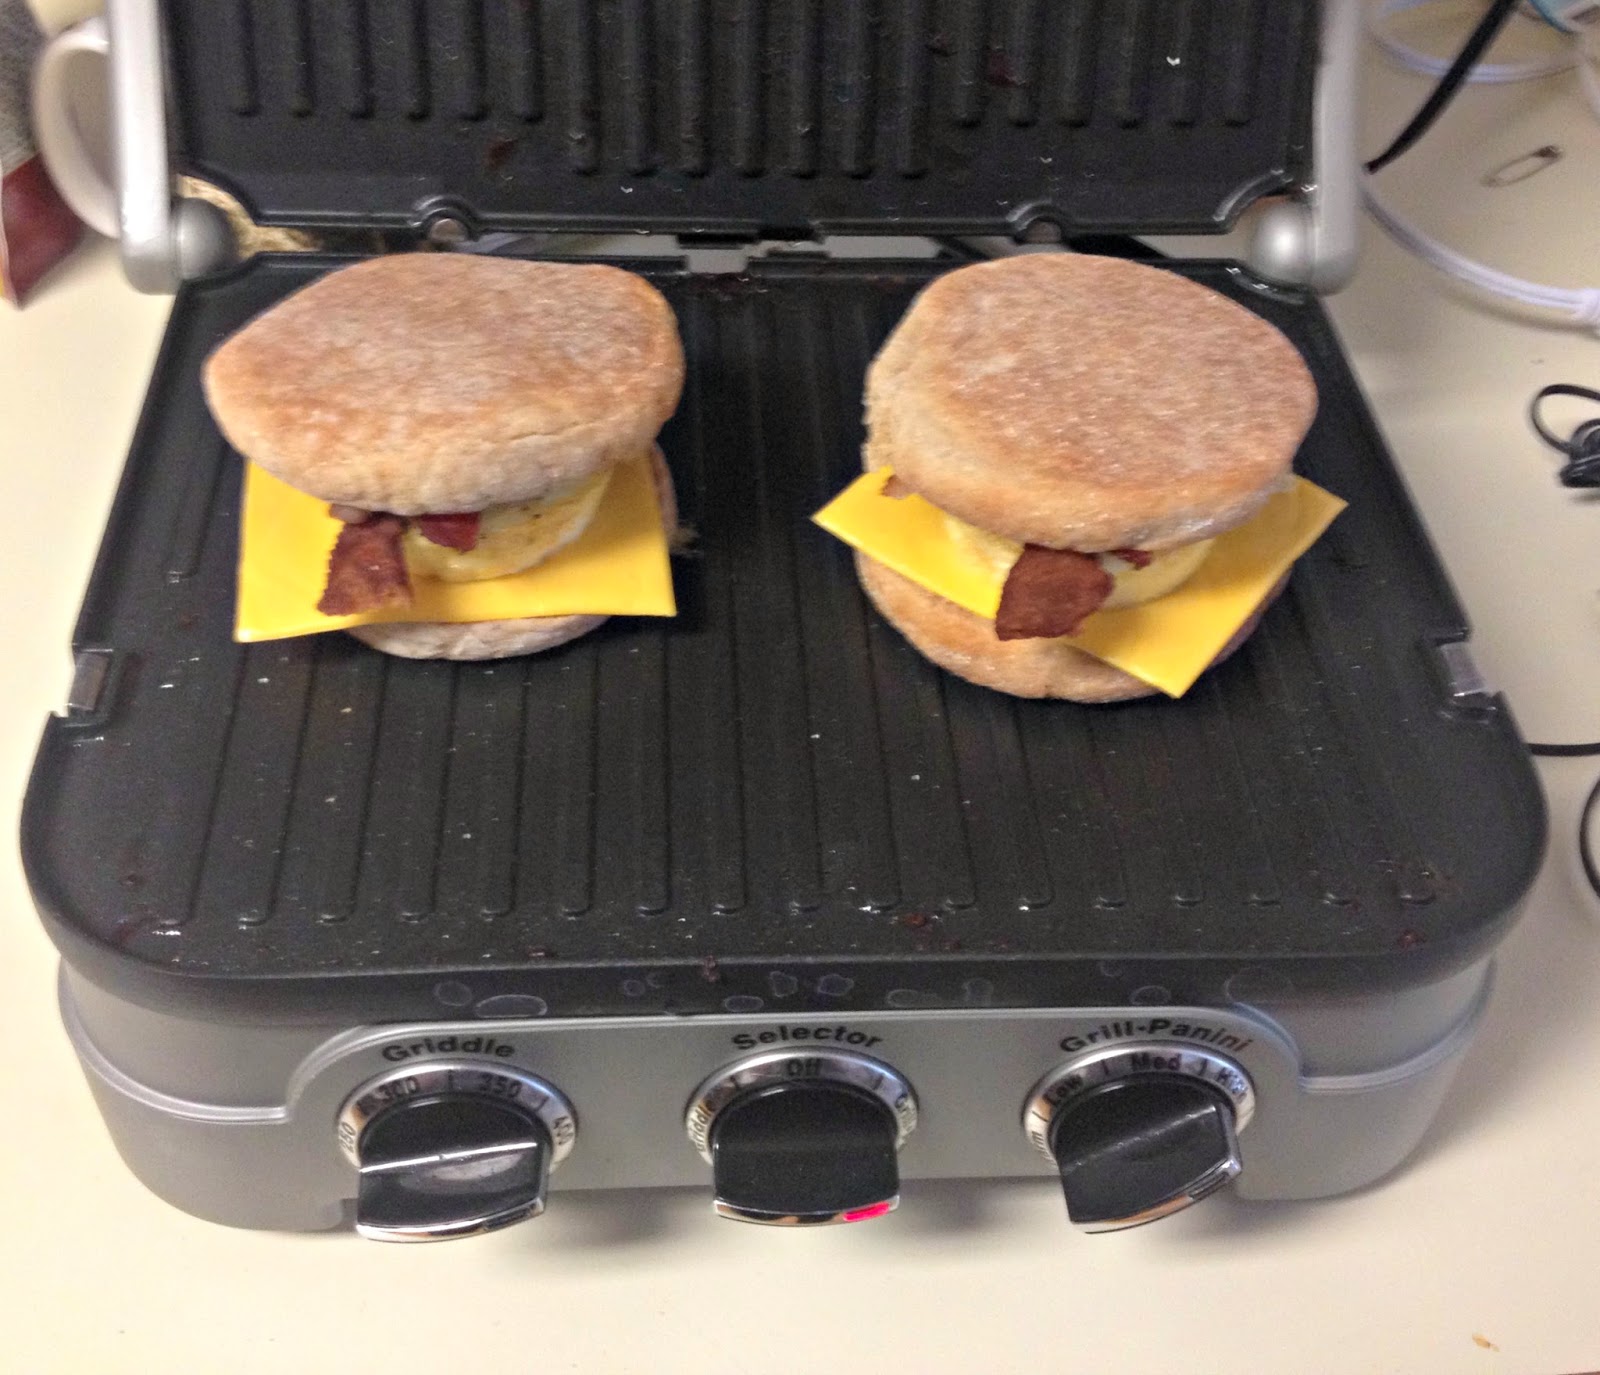
8) I used my fantastic panini maker we got as a wedding gift to melt the cheese and make them look beautiful
#breakfast #sandwich  
9) Wrap in foil and stick in the freezer. Pull out the night before and stick in the fridge for the morning.
#Breakfast #sandwiches


I am so excited to eat them this week for breakfast... Now off to meal prep for the entire week


Thursday, June 19, 2014

No Boil Lasagna

Life has been super busy lately. I got married June 7, 2014. To kick off wedding week, we had  his parents, my mom, both of his grandmothers, and my brother over for supper. The easiest thing that I could think of was lasagna. This recipe is super straightforward, can be made ahead of time and baked at a later date. Would be perfect to take to new parents as a freezer meal, to a family member who had surgery, or to a grieving family as a meal.

I really do need to get better at taking pictures of the entire process. But, I did get a picture of the final product. I think I picked the warmest day of the last two weeks to have the oven run for 3 hours between lasagna, dessert, and garlic bread.  This lasagna has been made by my mom for years and has been passed down to me.
#no#Boil#lasagna


No Boil Lasagna
2 lbs ground beef
Salt & Pepper
1/4 green bell pepper
1/2 onion
2 15 oz can tomato sauce
1 15 oz can of stewed or diced tomatoes
2 cups water
12 lasagna noodles
1 large container of cottage cheese
6 cups of mozzarella cheese
2 tsp garlic salt
1 1/2 tsp oregano

In a large pot place the hamburger, onion, bell pepper, salt and pepper in a pan. Brown and drain any excess grease off the meat.

Turn down the heat; add the tomato sauce, diced tomatoes, water, garlic salt, and oregano

In a 9x13 cake pan spread a thin layer of the sauce mixture

Lay down 3 noodles across and 1 on the bottom. Spread more sauce on the noodles. Put 1/3 of the cottage cheese and mozz cheese.   (Repeat this step two more times)

Bake at 350 for 75 minutes or until noodles are done, cheese is browned.


Now, I am off to spend some quality time with the husband...

Friday, January 3, 2014

Happy New Years!!

Happy New Years to all the people in blog land.  I have decided to start the year off right and get a new tattoo! It all began when my little brother entered college; I told him that when he finished college that I would go get new ink done with him. Well, college didn't work out for him, and he entered Job Corp for Welding. The deal changed at that point to he needed to complete the program and had a full-time job for six months before I would get one with him. He did it, when my mom and little brother came up for the Christmas Holiday from North Dakota we went to Eagle River Tattoo. Turns out getting a tattoo is on my mom's bucket list, so she got one too.
Mom's New Lady Bugs courtesy of
Matt @ Eagle River Tattoo


My tattoo in memory of my dad. Courtesy of Matt @Eagle River Tattoo 


My ink is AMAZING!!! The signature in my heart is my dad's name that was found on my kindergarten graduation card that I got in 1991. That card was 22 years old; I am lucky that my mom kept things like that. I walked in with an idea and no drawings. Described what I would like, and it came out a million times better than expected.

After the ink, it was finally time to eat our New Years dinner.  Before we had left for the tattoos, I had put the ribs I had bought from Costco in the roaster to cook on low. I wish I had taken a picture of them before they were devoured by the three of us, they were fall off the bone good! We also had Alaska King Crab and potatoes.

The sad point in the night came when I would have to say goodbye to my mom and little brother. I had gotten used to them being around, and house being noisier than when it is just me and the cats while the fiancee is on the slope working.  But, the countdown has already begun again because they will both be up here before the 7th of June for our wedding!!

Tuesday, December 31, 2013

Happy New Years

Well, I have made it another year.  I feel like I have accomplished a couple things in this year that I am proud of.

The big one is that I have made the step and started taking college courses to finish a degree in something. Right now, I am working on my Pharmacy Tech Certificate to get out of my job that I am currently working. Then get on the waiting list for nursing school (waitlist is at least a year long)

The second one that I am proud of is that I am being able to manage my personal life, work life, and school life all without having any major meltdowns. Granted there have been a few mini ones where I called my mom telling her that either school wasn't worth it or my job how much it sucked. Those are just two of the things that I feel I have succeeded in this past year.

Now, I have started my list of stuff I want to accomplish and when I want them done by.

  1. By becoming a healthier person
    • Not eating out so much and going to the gym 5 days a week
  2. Cutting out 95% of soda
    • January is going to be 30 days without soda and go from there.
  3. Attend Hot Yoga twice a month
  4. Not let the little things bug me
  5. Start and complete the 52 weeks of savings plan
  6. I want to finish and sell me crocheted things in my hobby
  7. Plan a Rocking wedding on June 7, 2014

Monday, August 12, 2013

Bruschetta Chicken

A couple weeks ago I was craving Italian food and didn't want to go out to the restaurant to get it. So, I used my noggin and came up with bruschetta chicken. 


1 container of Grape tomatoes
1/4 onion
2 cloves of garlic
Olive Oil
4 skinless chicken breast
Smoked provolone cheese
red wine
salt 
pepper
balsamic vinegar 
10 basil leaves

Salt and pepper both sides of the chicken breasts, set aside.
In a large sauté pan over medium-high heat, warm olive oil. Add chicken, cover pan, and cook for about 10 minutes. Flip chicken breasts and continue cooking until the chicken is cooked thoroughly 
While chicken is cooking, in a medium sauté pan over medium-high heat, warm remaining 1 tablespoon olive oil. Add the garlic and cook for about 1 minute,\. Add tomatoes, red wine and continue sautéing until tomatoes skin starts to soften/wrinkle, about 5 minutes. Turn off the heat and add the basil. 
Once the chicken is done, top the tops of each chicken breast with 1 slices of smoked provolone cheese. Pour tomato mixture on top. Cover pan with lid once more and let the mozzarella melt. 

Sunday, August 11, 2013

Overnight Crockpot Oatmeal

I am trying to get back on the healthy streak that I was on a while ago. After all, I can't look like an Oompa lumpa in my wedding pictures next summer. I love to eat and drink that is the problem I have always had.  I am fairly active, but I hate the gym.

I tried a new recipe last night to encourage me to eat breakfast during the week, and it will be utterly simple and on the go.

Apple Pie Overnight Oats
2 apples
2 cup old fashioned oats or Steel cut oats
4 cups water
1/3 c brown sugar
1 tsp cinnamon ( I will be putting more next time)

1) Spray the inside of crockpot before starting. I didn't do this, and now the pot is soaking in the sink in hot soapy water.
2) Core, cube and put apples in the bottom of a pot
3)Add brown sugar, cinnamon, oats, and water
4) Turn on low and cook for 8 hours.

Saturday, August 10, 2013

Lemon Poppyseed Pancakes and Blueberry Sauce

Downside to living in Alaska is not getting quality, tasty, and  fresh fruit. This summer I discovered a company that only comes to Alaska from California with a truckload of fruit every three weeks. The first order I got was a case of blueberries, blackberries, 1/2 case of peaches and 1/2 case of plums.  The peaches were the size of softballs and were extremely juicy.  With that fruit that I received I have eaten a bunch of it and canned some plums, made blackberry jam, peach bbq sauce, and plum sauce.  I have recipes for them to follow in future blogs. 

It has been very rainy and cloudy here, perfect for a great breakfast. I found a couple recipes and used them for inspiration. 


Blueberry Sauce
2 cups fresh or frozen blueberries
1 C Orange Juice
1/4 cup of warm water
3/4 c sugar
1/4 tsp Cinnamon
Dash of Vanilla


1/4c extra cold water
2.5 T cornstarch
Juice of 1 Lemon

Put the blueberries, OJ, water, sugar, vanilla, cinnamon in a pot. Bring to boil and simmer for a couple minutes. While it is simmering, combine the cornstarch and water. Once that is combined, pour in while stirring, and simmer until thick. Take off the heat and put the juice of one lemon in it. 


Lemon Poppyseed Pancakes
2 C buttermilk
2 large eggs
2 T butter, melted
3.5 lemons zested
1/3 cup poppy seeds
Juice of one lemon
2 C flour
1 tbsp baking powder
1 tbsp baking soda
1/4 cup sugar
pinch of salt

In a large bowl pour the buttermilk, eggs, butter, poppy seeds, zest of lemons, and juice of one lemon. Whisk them all together. Then add the flour, baking powder, baking soda, sugar, and salt into the bowl. Combine all of them.  Heat the griddle or pan. Makes about 15 pancakes with a 1/4 cup of batter for each pancake. 

Sunday, May 26, 2013

Memorial Day Weekend

Happy Memorial Day to all. Thank you to those who have served in the Armed Services.

In exciting news I traded in my 2008 Chevy Cobalt for an amazing new vehicle for me. I got a 2011 GMC Terrain AWD it rides like a dream and has a lot more room.
Watch out world it has warmed up a lot here in the last couple days. It has been in the 70's, I had forgotten what that felt like after 232 days. I have been busy planting flowers and grilling everything possible on the grill. I also created a new recipe with inspiration from two salads. One was a Grilled Corn Orzo Salad with Chili Lime Vinaigrette and Mediterranean Orzo Salad


Now for the long anticipated Salad. I am having a hard time coming up with a cool and funky name for it...
1/4 cup feta cheese crumbles
1/4 cup pitted kalamata olives, sliced
1 cup orzo, uncooked
2 ears sweet corn
1 avocado, chopped
¼ small red onion, minced
2 Tablespoons chopped basil

Dressing
½ cup olive oil
honey (can use however much you want) I think I used 2tbsp
Juice of 1 lime
1/4 teaspoon chili powder (Next time I will use a little bit more)
Salt & pepper

Cook orzo in a large pot of salted, boiling water until al dente. Drain and rinse under cold water. Set aside.

Shuck corn then grill for 5-6 minutes, rotating every minute or so to evenly char on all sides. Let cool slightly, then cut kernels off the cob.

Combine cooked orzo and corn kernels avocado, red onion, olives, feta and basil in a large bowl and stir to combine.

For the dressing: Combine all ingredients in a small bowl and whisk to combine or you can put it in blender. Pour over salad and toss to coat. Serve chilled, or at room temperature

Sunday, May 19, 2013

A Little About Me!

 I have to be crazy to start a blog, how can I have anything interesting to say?! Well, here goes nothing!

First a little about the title. Great Plains Transplant In Alaska. I was born and raised my entire life in the middle of nowhere North Dakota 12 miles from the Canadian border and the nearest town of 1000 people was about 10 miles away. In Mohall, the had a school, courthouse, post office, 3 bars, four churches, two gas stations, a clinic and a little shop that cut your hair. I moved to Alaska in 2007, not by choice, but that is another story for another day. I have learned to love Alaska now and wouldn't move anywhere else.

Now to tell you about the cast of characters. The first person is myself,   I was born in Minot, North Dakota and raised in Mohall, North Dakota. My amazing fiance and I have two furry children together (Monkey and Tiger). He is a heavy equipment mechanic on the North Slope of Alaska.

My dad was a hard working man who was superman, truck driver, and oil driller. My dad was an amazing man who taught me how to work hard and how to be a great person.  This past November my dad passed away due to kidney disease and a brain bleed. I miss him every day and would love just to be able to make a phone call up to him to talk to him.

My mom is my rock, I get my strength, tenacity, and will from her. She has been with the county for 30+ years as an eligibility tech. I have one little brother, well he is not so little but when you are six years younger than me that is the title you get.  He is a certified welder and lover of the Xbox.

I love to cook, bake, drink, sew, knit, crochet, garden, share my adventures and crafting in general